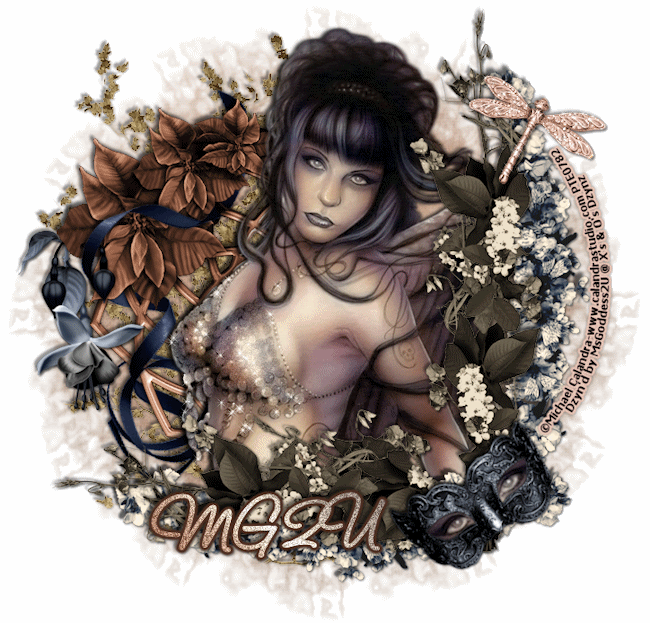
Friday, February 25, 2011

This tutorial is written for experienced PSP users.
Supplies:
Scrap kit called Perfectly Pink by KnC Scraps here
Font used is Scriptina Pro
Mask 258 by Weescotlass Creations here
Plug in Eye Candy 6 Glass & Gradient Glow
Xero Radiance
Open the circle frame
Paste as a new layer
Re size
Click inside the frame with your magic wand
Expand by 2
Open paper 8
Paste as a new layer
Selections Invert Delete
Select None
Move your paper layer beneath your frame layer
Open the closeup of your tube
Paste as a new layer
Position it above your paper layer
Click inside your frame with your magic wand again
expand by 2
Click on your tube layer
Selections Invert Delete
Select None
Move this layer beneath your frame layer
Apply Xero Radiance & change the blend mode to Luminance
Add DS
Add DS to your frame
Open your whole tube
Paste as a new layer
Re size
Position
Add DS
Open Flower 1
Paste as a new layer
Re size
Place on the right
Add DS
Open flower 2
Paste as a new layer
Re size
Place it on Flower 1
Add DS
Open flower 4
Paste as a new layer
Re size
Place it behind the flowers
Add DS
Open flower branch
Paste as a new layer
Re size
Place at the bottom
Add DS
Duplicate
Mirror
Open the vine
Paste as a new layer
Re size
Place it on the right of the frame
Add DS
Duplicate
Mirror
Open the rose bottle
Paste as a new layer
Re size
Position it on the right by the flowers
Add DS
Open the white ribbon
Paste as a new layer
Re size
Place below the flower branches
Add DS
Open the button
Paste as a new layer
Re size
Position on the frame
Add DS
Open the glitter hearts
Paste as a new layer
Re size
Place it on the top of your tag
Add DS
Open Sequins
Paste as a new layer
Re size
Place behind the flowers
Add DS
Open paper 8 again
Paste as a new layer
Move to the bottom
Apply mask
Merge group
Add all © info
Add your name
Eye Candy 6 Glass
Gradient Glow
Add DS
Merge visible
Save as PNG!!
Thanks for trying my tutorial!!

Thursday, February 24, 2011

This tutorial was written for experienced PSP users
Supplies:
Scrap kit by Butterfly Kisses Scraps here
Artwork is Fred Winkler.You can purchase his work at CDO here
Font used is called P22 Ohley
Mask of choice
Plug in is Eye Candy 6 but you can also use Eye Candy 4
Open a new image 500x500
Open frame 1
Paste as a new layer
Re size
Click inside the frame using your magic wand
Expand by 3
Open paper 8
Paste as a new layer
Paste as a new layer
Selection Invert Delete
Add DS to your frame
Open your tube
Paste as a new layer
Re size
Add DS
Open background 3
Paste as a new layer
Re size
Place behind your paper layer
Add DS
Open lamp post
Paste as a new layer
Re size
Position
Add DS
Open flower 1
Paste as a new layer
Re size
Position
Add DS
Open flower 2
Paste as a new layer
Re size
Position
Add DS
Open the clock
Paste as a new layer
Re size
Position on the top of the frame
Add DS
Open the piano
Paste as a new layer
Re size
Position behind the tube
Add DS
Open the chest
Paste as a new layer
Re size
Position behind the tube and the lamp
Add DS
Open ribbon 4
Paste as a new layer
Re size
Position behind the clock
Add DS
Open the sparkles
Paste as a new layer
Re size
Add all © info
Add your name
Eye Candy Glass & gradient glow
Add DS
Open paper 3
Paste as a new layer
Move to the bottom of your layers
Move to the bottom of your layers
Apply mask Merge group
Merge Visible
Save as a PNG!!
Thanks so much for trying my tutorial!!!!!
Sunday, February 20, 2011

This tutorial was written for experienced PSP users
Supplies:
Scrap kit called All Boy by Creative Scraps by Crys here
Font is called Cocktail Script and Boingo
mask of choice
Plugin used is Eye Candy 4
Open a new image 500x500
Open grass
Paste as a new layer
Re size
Add DS
Open the tree house
Paste as a new layer
Re size
Position above the grass
Add DS
Open Bushes
Paste as a new layer
Re size
Place in front of the tree house
Add DS
Open the fence
Paste as a new layer
Re size
Place it behind the tree house
Add DS
Duplicate
Arrange
Open the bee and bee path
Paste as a new layer
Re size
Arrange
Add DS
Open the stump
Paste as a new layer
Re size
Place on the right of the grass
Add DS
Open the little boy
Paste as a new layer
Re size
Add DS
Open the airplane
Paste as a new layer
Re size
Position
Add DS
Open the frog
Paste as a new layer
Re size
Place it on the stump
Add DS
Open the dog
Paste as a new layer
Re size
Place behind the little boy
Add DS
Open paper 4
Paste as a new layer
Move to the bottom
Apply Mask
Merge group
Add your word art
I added Eye Candy Glass to mine
Add DS
Add Your name
Glass
Add DS
Merge Visible
Save as a PNG!
Thanks for trying my tutorial!
Friday, February 18, 2011

This tutorial was written for experienced PSP users
Supplies:
Scrap kit by Grunge & Glitter called Gothic Couture here
Artwork by Elias Chatzoudis.You can purchase his work here
Font used is Trashco
Mask of choice
Plug in Eye Candy 4 Glass & Gradient Glow
Open a new image 500x500
Open frame 3
Paste as new layer
Re size
Click inside the frame using your magic wand
Expand by 3
Open paper 5
Paste as new layer
Selections,Invert,Delete
Select none
Move your paper layer below your frame layer
Open the tied tags
Paste as new layer
Re size a little bit
Click inside your frame again with magic wand
Expand by 3
Click on your tags again
Selections,Invert,Delete
Select none
Move this layer below your frame layer
Add DS
Add DS to your frame also
Open your tube
Paste as new layer
Re size
Place it in the center of your frame
Add DS
Open flower 6
Paste as new layer
re size
Place it just below your tube
Add DS
Open dragonfly
Paste as new layer
Re size
Place it on the left side of your frame
Add DS
Open zipped heart 1
Paste as new layer
Re size
Place it just beneath your dragon fly
Add DS
Open doodles 1 & 2
Paste as a new layer
Re size
Arrange them behind your paper layer
Add DS
Open Paper 17
Paste as a new layer
Move this layer to the bottom of your layers
Apply Mask
Merge group
Add all © info
Add your name
Eye Candy 4
Glass
Gradient Glow
Add DS
Merge visible
Save as a PNG!
Thanks for trying my tutorial!!
Thursday, February 17, 2011

This tuorial is written for experienced PSP users
Supplies:
Scrap Kit by Rieka Rafita called Secret Garden.You can purchase this
beautiful kit here
use all © info and license number.
Font used is UpDock
Plug in used is Eye Candy 4 Glass & Gradient Glow
Open a new image 500x500
Open the road
Paste as new layer
Re size
Add DS
Open the fence
Paste as new layer
Re size
Place it in front of the road
Add DS
Open the gate
Paste as new layer
re size
Place it in front of the fence
Add DS
Open your tube
Paste as new layer
Re size
Place it behind the gate
Add DS
Open the grass
Paste as a new layer
Place it in front of your tube
Add DS
Duplicate it twice and spread out
Open your bird bath
Paste as new layer
Re size
Place it behind your fence on the right
Add DS
Open the bird
Paste as new layer
Re size
Place it on the bird bath
Add DS
Open the well
Paste as new layer
Re size
Place it behind the fence on the left
Add DS
Add your bird to the top of the well also
Open the butterflies
Paste as new layer
Re size
Place them behind your tube
Add DS
Open flower 2
Paste as a new layer
Re size
Place it in the grass
Add DS
Duplicate them and spread them out
Open leaves 2
Paste as new layer
re size
Place it at the end of the fence
Add DS
Duplicate
Mirror
Place it with the original leave
Open flower 3
Paste as new layer
re size
Place it in between your two leaves
Add DS
Merge these 3 layers together
Duplicate
Mirror
Open the watering can
Paste as new layer
Re size
Place it in the grass on the left of your tube
Add DS
Open flower 5
Paste as new layer
re size
Place it behind the watering can and the gate
To where it is peeking out
Add DS
Open the bicycle
Paste as new layer
Re size
Place it in front of the fence on the right
Add DS
Open the rocks
Paste as new layer
Re size
Place them behind the bike
Add DS
Open tree 2
Paste as new layer
re size
Place it behind the bird bath
Add DS
Open the timber
Paste as new layer
Re size
Place it behind the bike in the grass
Add DS
Open bow 3
Paste as new layer
Re size
Place it on the gate
Add DS
Duplicate
Mirror
Open the sparkle
Paste as new layer
Re size
Place it right above your tube
Add all © info
Add your name
Eye Candy 4
Glass
Gradient Glow
Merge visible
Save as a PNG!
Thanks for trying my tutorial!!

This tutorial is written for experienced PSP users.
Supplies:
Scrap kit called Bluetonic by Seven's Scraps here
Artwork by Lix here
Remember to add your © and License info to the tag
Font used is Inspiration ROB which is PTU
Plug in is Eye Candy 4 Gradient Glow
Ok,open a new image 500x500
Open frame 18
Paste as a new layer
Re size using your pick tool
That's how I re size b/c I find it easier
Click inside your frame using your magic wand
Expand by 3
Open paper 8
Paste as new layer
Selections,Invert,Delete
Select none
Add DS to your frame
Open doodle 4
Paste as a new layer
Re size
Place it behind your frame layer
Add DS
Open buttons 1
Paste as new layer
Re size
Place it at the bottom of your frame
Add DS
Open border 1
Paste as a new layer
Re size
Place it on your buttons
Add DS
Open your tube
Paste as new layer
Re size
Add DS
Open stars 1
Paste as a new layer
Re size
Place it behind your frame layer
Add DS
Open flower bow 4
Paste as a new layer
Place it on the left bottom side of your frame
Add DS
Open flower 1
Paste as a new layer
Re size
Place it on the bow
Add DS
Open your light blue butterfly
Paste as new layer
Re size
Place it on your blue flower
Add DS
Open diamond 4
Paste as new layer
Re size
Place it on the top left of your frame
Add DS
Open diamond 2
Paste as new layer
Re size
Mirror
Place it on diamond 4
Add DS
Open rings 1
Paste as new layer
Re size
Place them beneath your tube
Add DS
Open ribbon 1
Paste as new layer
Re size
Place it on the top of your frame
Add DS
Open hearts 1
Paste as new layer
Re size
Place it on the top right of your frame
Add DS
Open dices 2
Paste as new layer
Re size
Place it on the bottom right of your frame
Add DS
Open tag 2
Paste as a new layer
Re size
Place it on the bottom right of your frame
Add DS
Add all © info
Add your name and any word art you may want on tag 2
Eye Candy 4
Gradient glow
Add DS
Merge visible
Save as a PNG
Thanks for trying my tutorial!
I will gladly display any tuts of mine you send me on my blog :)
So Send them!!!!
Tuesday, February 15, 2011

This tutorial was written for experienced PSP users
Supplies:
Scrap kit by Clarey Designz called Emo Girl.You can purchase this kit here
Artwork by Eugene Rzhevskii at PicsForDesign here
Font called LDJ Jilly Nilly
Plug in Eye Candy 4 Gradient Glow
Open a new image 500x500
Open striped frame 1
Paste as new layer
Re size
Click inside of your frame using your magic wand
Modify by 3
Open paper 15
Paste as a new layer
Selections,Invert,Delete
Select none
Move your paper layer beneath your frame layer
Add a DS to your frame
Open your tube
Paste as new layer
Re size
Place it on top of your frame
Using your eraser tool
Erase some of the tube at the bottom so it will look like she's poping
out the frame
Add DS
Open skull 2
Paste as a new layer
Re size
Place it on the left of your tube
Add DS
Open your sneaker
Paste as a new layer
Re size
Place it in front of the skull
Add DS
Open the gun
Paste as new layer
Re size
Place it on the right of the tube
Add DS
Open word art 7
Paste as new layer
Re size
Place it at the bottom of your tube
Add DS
Open string 2
Paste as new layer
Re size
Position it on top of your word art
Using your eraser tool
Erase some of the string so it will have the effect
that it wraping around the words
Open droplets 2
Paste as new layer
Re size
Move this layer all the way to the bottom of your layers
Add DS
Open heart 3
Paste as new layer
Re size
Place this behind your gun
Add DS
Open starburst 1
Paste as new layer
Re size
Place it behind your tube
Add DS
Open swirly 1
Paste as a new layer
Re size
Place this on top of your starburst
Add DS
Add all © info
Add your name
Effects
Eye candy 4
Gradient Glow
Add DS
Merge visible
Save as a PNG!!
Thanks for trying my tutorial!!
Subscribe to:
Comments (Atom)
Stay Away


About Me
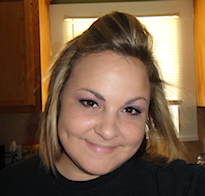
- Brooke
- Hello! My name is Brooke! I am from Southern Louisiana.SAHM to 3 kids and married to my best friend.I have been PSPing since Oct 2010 and loving every second of it! I love learning new things and being creative. Also a special thanks to Sue Ellen from Wicked Creationz Scraps for teaching me how to PSP!! Love you lots Sue :)
My Blinkies


Protected

Awards


Stores


My Fav Blogs


I CT For


My Blog List


Dork Sistaz


