Sunday, July 17, 2011

 Posted by
Brooke
Posted by
Brooke
This tutorial was written for experienced PSP users
Supplies:
Scrap kit by Polka Dot Scraps called Emo Gurlz Rock here
Artwork by Elias Chatzoudis at PTE here
Font is Fabulous 50's
Plug in Eye Candy 6
New image 500x500
Open frame 1
Paste as a new layer
Re size
Position
Click inside the frame using your magic wand
Expand by 3
Open paper 7
Paste as a new layer
Selections Invert Delete Select None
Add DS to your frame
Open your tube
Paste as a new layer
Re size
Position
Add DS
Open and paste these elements along with a DS:
Halftone 1 & 2
Flower 1 & 2
Word Art 1
Ribbon 1
Swirl
Add all © info
Add your name
Eye Candy Glass
Gradient Glow
Add DS
Merge visible
Save as PNG!
 Labels:
Thanks To Rieka Rafita my blog looks AMAZING!!! Please visit her store to get your blog design here
Saturday, July 16, 2011

This tutorial was written for experienced PSP users
Supplies:
Scrap kit by Rieka Rafita called I Heart Emo here
Artwork by Misticheskaya at PFD here
Mask included in kit
New image 500x500
Open frame 2
Paste as a new layer
Re size
Position
Click inside using your magic wand
Expand by 3
Open paper 16
Paste as a new layer
Selections Invert Delete Select None
Add DS to your frame
Open your tube
Paste as a new layer
Re size
Position
Add DS
Open and paste these elements along with a DS:
Can
Bunny
Flash Drive
Skull 1
Heart Wing
Sparkle
Skateboard
Open paper 17
Paste as a new layer
Apply Mask
Merge group
Add all © info
Add your name
Eye Candy gradient Glow
Add DS
Merge visible
Save as PNG!


This tutorial was written for experienced PSP users
Supplies:
Scrap kit collab by Pimp'd Designz and Designs by Sarah called Party Girl here
Artwork by VeryMany at Scraps And The City here
Font is Chantal Light
Plug in Eye Candy 6
New image 500x500
Open pd frame 5
Paste as a new layer
Re size
Position
Click inside using your magic wand
Expand by 3
Open pd paper 1
Paste as a new layer
Selections Invert Delete Select None
Add DS to your frame
Open your tube
Paste as a new layer
Re size
Position
Add DS
Open and paste these elements along with a DS:
pd sparkle
sb ribbon 7
sb feather 1
sb flower 3
sb ribbon 3
pd frame 2
sb girl print
Add all © info
Add your name
Eye Candy Glass
Gradient Glow Twice
Add DS
Merge visible
Save as PNG!
Friday, July 15, 2011

This tutorial was written for experienced PSP users
Supplies:
Scrap kit called Playa by Toxic Desirez here
Artwork by Keith Garvey at PTE here
Plug in Eye Candy 6
New image 500x500
Open frame 2
Paste as a new layer
Re size
Position
Click inside the frame using your magic wand
Expand by 3
Open paper 17
Paste as a new layer
Selections Invert Delete Select None
Add DS to your frame
Open and paste your tube
Re size
Position
Add DS
Open and paste these elements along with a DS:
Beaded String
Bubbles
Journal
Lolli 1 & 2
Splatter
Sparkles
Add all your © info
Add your name
Eye Candy Glass
Add DS
Merge visible
Save as PNG!
Thursday, July 14, 2011

This tutorial was written for experienced PSP users
Supplies:
Scrap kit by Addictive Pleasures called Hermione here
Artwork by Elias Chatzoudis at PTE here
Font is Juice ITC
Mask of choice
Plug in Eye Candy 6
New image 500x500
Open frame 3
Paste as a new layer
Re size
Position
Click inside the frame using your magic wand
Expand by 3
Open paper 3
Paste as a new layer
Selections Invert Delete Select None
Add DS to your frame
Open your tube
Paste as a new layer
Re size
Position
Add DS
Open and paste these elements along with a DS:
Flower
Text
Clam
Fish
Seaweed
Beads
Open paper 2
Paste as a new layer
Apply mask
Merge group
Add all © info
Add your name
Eye Candy Glass
Gradient Glow
Add DS
Merge visible
Save as PNG!
Wednesday, July 13, 2011

This tutorial was written for experienced PSP users
Supplies:
Scrap kit by Rebellious Scraps called Tahiti Beach here
Artwork by Elias Chatzoudis at PTE here
Font is called MoxieRoxie
Mask of choice
Plug In Eye Candy 6
New image 500x500
Open frame 5
Paste as a new layer
Re size
Position
Click inside the frame using your magic wand
Expand by 3
Open paper 10
Paste as a new layer
Selections Invert Delete Select None
Add DS to your frame
Open your tube
Paste as a new layer
Re size
Position
Add DS
Open and paste these elements along with a DS:
Fence 2
Grass
Flower 5
Sign
Tiki Torch
Sign 2
Parrot 1
Tiki Mask
Bubbles
Open paper 11
Paste as a new layer
Apply Mask
Merge group
Add all © info
Add your name
Eye Candy Glass
Gradient Glow
Add DS
Merge visible
Save as PNG!

This tutorial was written for experienced PSP users
Supplies:
Scrap kit by Designs by Sarah called Sort of FairyTale here
Artwork by Suzanne Woolcott here
Font is LavishlyYoursROB PTU
Mask of choice
Plug in Eye Candy 6
New image 500x500
Open frame 2
Paste as a new layer
Re size
Position
Click inside the frame using your magic wand
Expand by 3
Open paper 5
Paste as a new layer
Selections Invert Delete Select None
Add DS to your frame
Open your tube
Paste as a new layer
Re size
Position
Add DS
Open and paste these elements along with a DS:
Branch 1-3
Flower 1
Fairytale Lights
Bow 1
Ribbon Charm
Open paper 6
Paste as a new layer
Apply Mask
Merge group
Add all © info
Add your name
Eye Candy Glass
Gradient Glow
Add DS
Merge visible
Save as PNG!

This tutorial was written for experienced PSP users
Supplies:
Scrap kit called Spider Girl By Toxic Desirez here
Artwork by Elias Chatzoudis at PTE here
Font is Homoarak
Plug in Eye Candy 6
Big mask 16 by Vix here
Open frame 1
Paste as a new layer
Re size
Position
Click inside the frame using your magic wand
Expand by 3
Open paper 14
Paste as a new layer
Selections Invert Delete Select None
Add DS to your frame
Open your tube
Paste as a new layer
Re size
Position
Mirror
Add DS
Open and paste these elements along with a DS:
Flower 1 & 2
Cupcake
Webbed Heart
Spider Tag
Word Art
Sparkles
Open paper 2
Paste as a new layer
Apply Mask
Merge group
Add all © info
Add your name
Eye Candy Glass
Gradient Glow
Add DS
Merge visible
Save as PNG!
Tuesday, July 12, 2011

This tutorial was written for experienced PSP users
Supplies:
Scrap kit called Melodia from Addictive Pleasures here
Template 2 by Alikas Scraps here
Artwork by Elias Chatzoudis at PTE here
I bought this tube from MPT when he was there
Font is called Mandigo
Plug in Eye Candy 6
Open the temp
Delete © layer
Use papers 2 5 & 6
Change your word art to color #b04995
by Selections Select All Float De float
Add a new raster layer
Flood fill
Selections Select None
Delete original word art layer
Add a Gradient Glow and DS
Change frame 1 & 2 with the same color as your word art
Add noise to your frames
Open your tube
Paste as a new layer
Re size
Position
Add DS
Open and paste these elements along with a DS:
Netting 2
Bomb
Skulls
Joker
Swirl Ribbon
Glass
Bat
Add all © info
Add your name
Eye Candy Glass
Gradient Glow
Add DS
Merge visible
Save as PNG!
Sunday, July 10, 2011

This tutorial was written for experienced PSP users
Supplies:
Kit by Pimp'd Designz called Grunge It here
Artwork by VeryMany at Scraps And The City here
Font is Adios Script Pro
Plug in Eye Candy 6
New image 550x200
Open your tube
Paste as a new layer
Duplicate your tube twice and arrange
Merge tubes together
Open paper 6
Paste as a new layer
Change blend mode to hard light
Click on your background layer
Selections Select all Select Selections Borders
Width 3
New raster layer
Flood fill with color of choice
Select None
Move this layer to the top
Repeat this step with Width 6 and a different color
Move this layer below your first frame layer
Open your tube
Paste as a new layer
Re size
Position
Add DS
Open and paste these elements with a DS:
Print 4
Dots
Tape
Add all © info
Add your name
Eye Candy Glass
Add DS
Merge visible
Save as PNG!
Saturday, July 9, 2011

This tutorial was written for experienced PSP users
Supplies:
Scrap kit by Rieka Rafita called Be Happy here
Artwork by Lix at PTE here
I purchased this Lix from CILM when it was open
Font is LDJ Jilly Willy
Mask of choice
Plug in Eye Candy 6
New image 500x500
Open frame 3
Paste as a new layer
Re size
Position
Click inside your frame using your magic wand
Expand by 3
Open paper 15
Paste as a new layer
Selections Invert Delete Select None
Add DS to your frame
Open your tube
Paste as a new layer
Re size
Position
Add DS
Open and paste these elements along with a DS:
Word art 1-4
Glitter Spill
Ribbon 1 & 3
Open paper 15
Paste as a new layer
Apply Mask
Merge group
Add all © info
Add your name
Eye Candy Glass
Gradient Glow
Add DS
Merge visible
Save as PNG!
Subscribe to:
Posts (Atom)
Stay Away


About Me
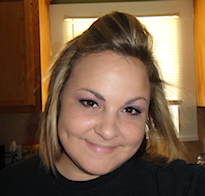
- Brooke
- Hello! My name is Brooke! I am from Southern Louisiana.SAHM to 3 kids and married to my best friend.I have been PSPing since Oct 2010 and loving every second of it! I love learning new things and being creative. Also a special thanks to Sue Ellen from Wicked Creationz Scraps for teaching me how to PSP!! Love you lots Sue :)
My Blinkies


Protected

Awards


Stores


My Fav Blogs







I CT For


My Blog List




Dork Sistaz


